menu bar

Wednesday, June 18, 2014

DIY Washi tape dispenser holder caddy

Something different today! A little bit of FIGJAM.

It came to me while I was trying to wrap a gift and make dinner at the same time.. Stay with me, it will make sense!

Born out of frustration mixed with a little procrastination (frustprastication?) I thought it splendid enough to share with my fellow Washi tape lovers. It should be noted that this was whipped up while I was cooking so 10 mins - tops (the decorating time is on top of this). I also used the easiest and most accessible things I could find - I hate having a brain wave and then having to make a trip to the hardware.
This is my 'before' shot, messy, always struggling to find the end of the tape and overflowing, until...
What you will need:
  • A plastic aluminium foil container/dispenser without the aluminium foil (see the cooking connection now?) - this one was purchased at Coles for around $5. - The genius here, is that the plastic caddy already has serrated teeth intended to cut the aluminium foil but do a rather good job at cutting the soft washi tape as well!
  • A wire coat hanger
  • Some pliers/wire cutters for cutting and bending the wire
  • Spray paint (optional)
Method:
  1. Cut the lid off the dispenser (you can keep it on if you like but I think the way the colours of the tape all lined up looks, is pretty!)
  2. If you are going to spray paint it, do it now or you can skip this step, put it all together and spray it later or just leave it and decorate with washi tape!
  3. Measure the length of the plastic dispenser and add an extra 3cm
  4. Using the long straight edge of the coat hanger, cut it to length
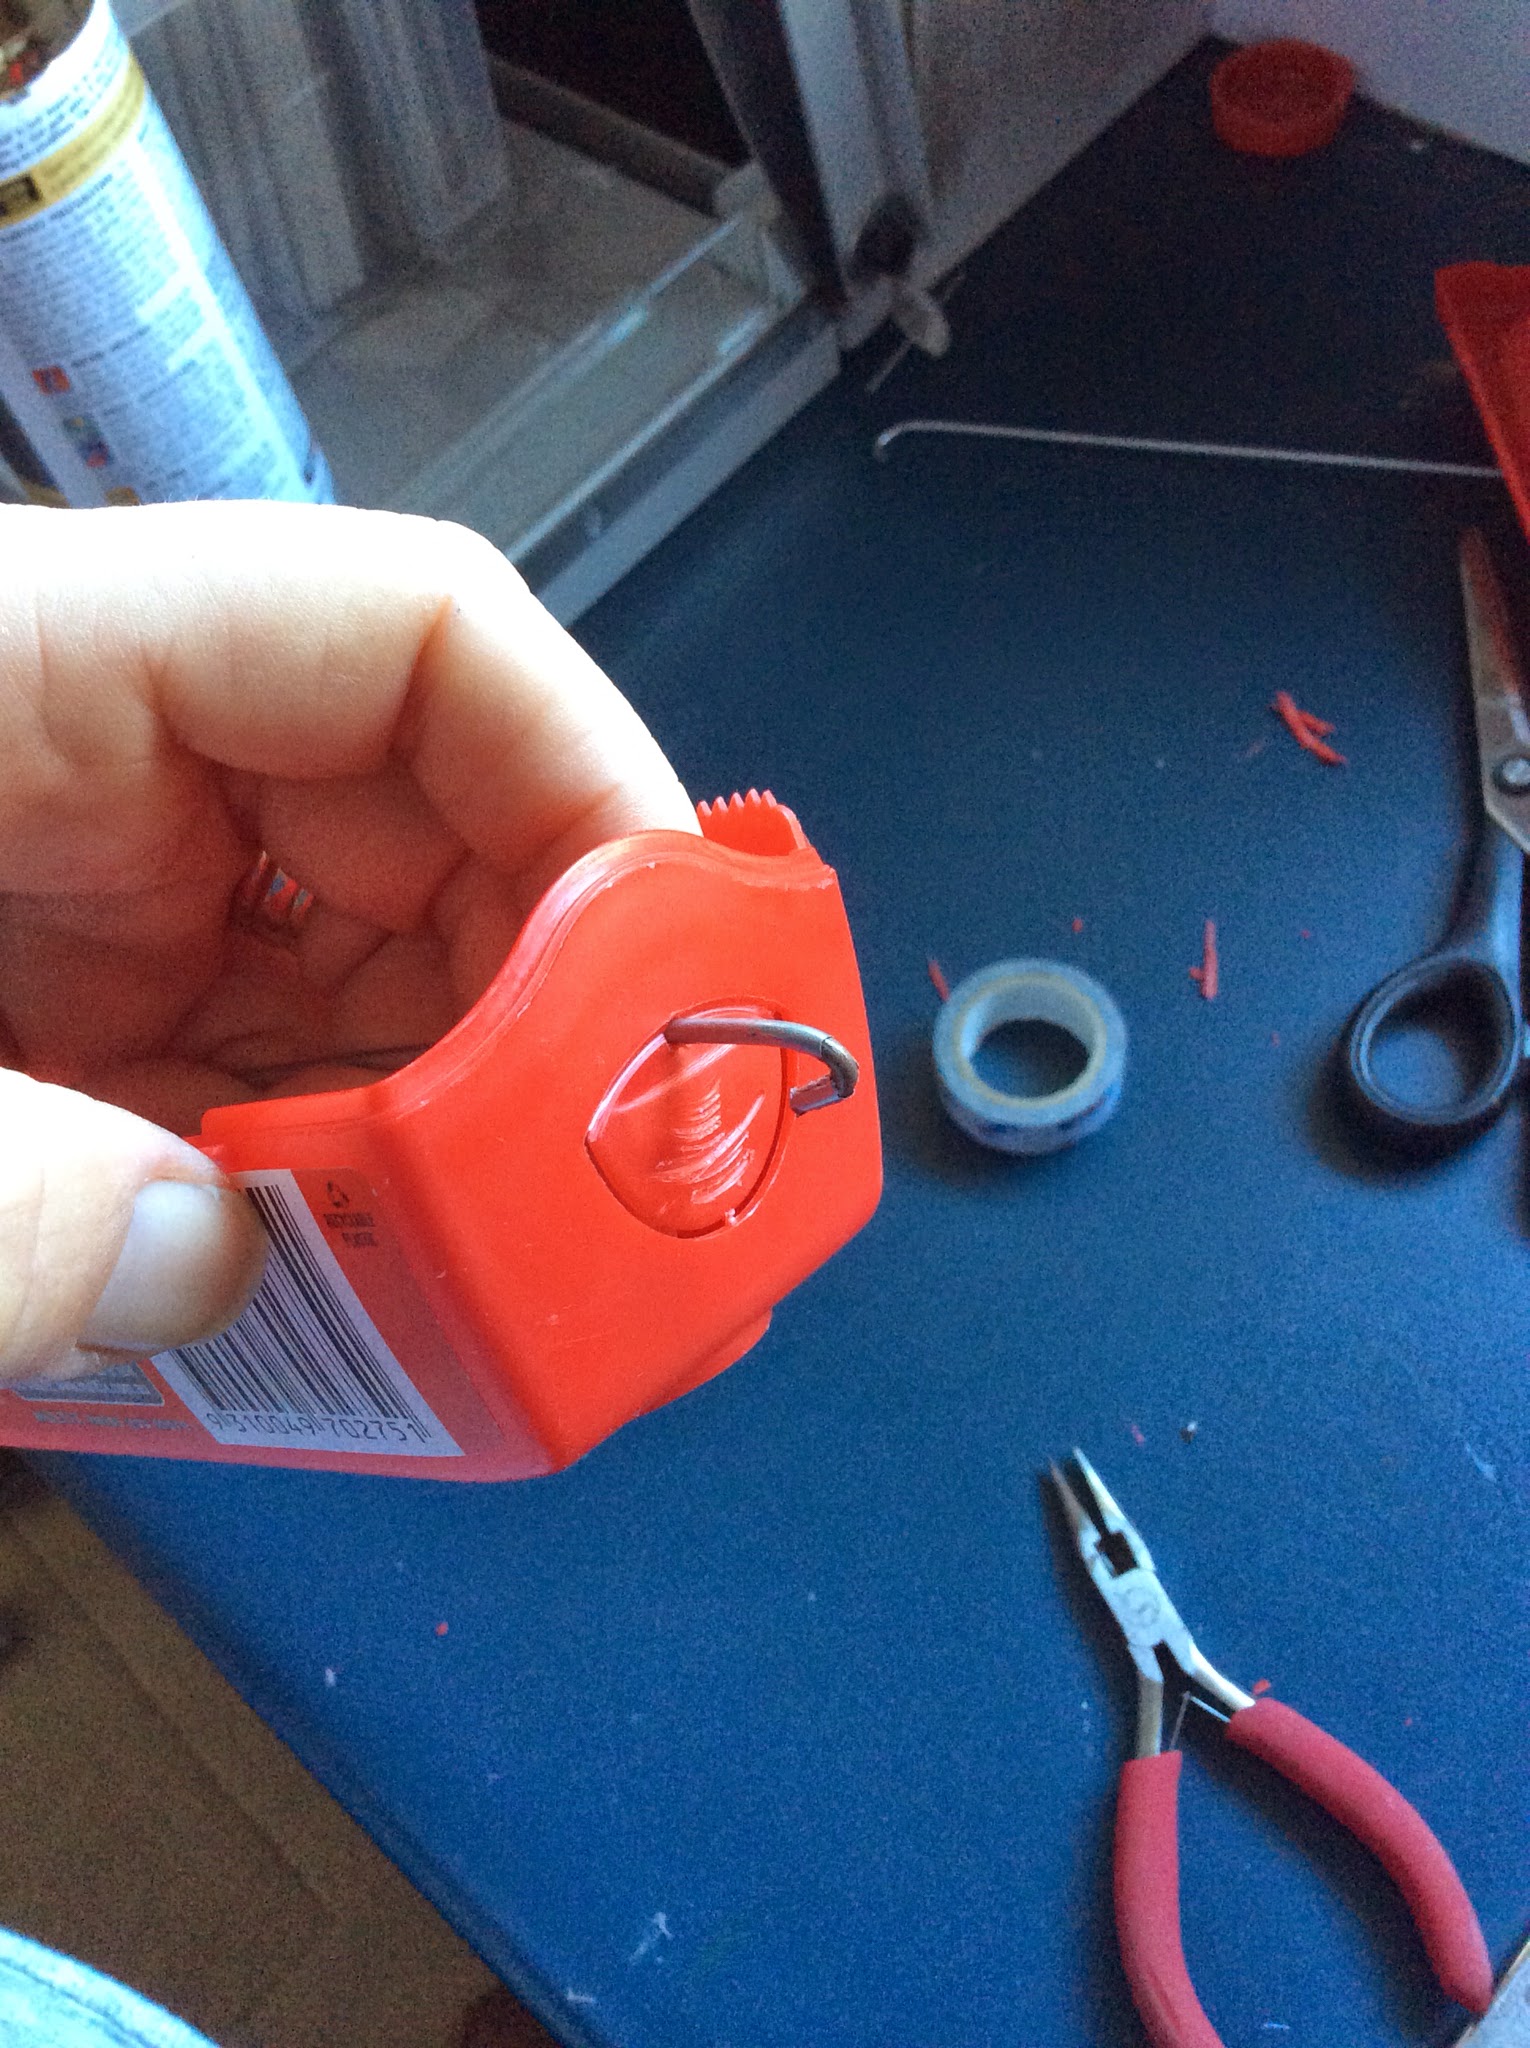
  5. Poke a small hole in the middle of both sides of the dispenser (I used the tip of my pliers)
  6. Thread the wire through both holes -you want the fit to be tight so the wire isn't loose and falls out.
  7. On one end, bend the wire around on itself to form a hook or loop so you can grip and pull it in and out to load the tape. This also locks it a little and makes the end blunt.
  8. Pull the wire back out and put all of your tape in. Be sure to have the rolls facing the right way so the tape rolls over the top and can be ripped off on the dispensers teeth. I un-rolled a little tape on each and stuck them each down.
  9. Re-thread the wire through all the rolls of tape and cut the end of the wire so that it pokes out around 1cm
  10. Smile smugly at your marvellous organising tool!
Poke a hole in the sides
Hook the end of the wire around To lock
Sit all the rolls in the caddy and thread the wire through
Washi tape neat and tidy!


Monday, May 12, 2014

Letterpress birth announcement for a baby boy

Our first letterpress birth announcement for a baby boy!
A very special birth announcement/ baby thank you card, with custom designed envelope liner.
Welcome into the world Lukas!


SPECIFICATIONS
SIZE: 110X155mm
PAPER: 300gsm 100% cotton rag
COLOUR: 1 colour
OTHER: Chrystal archive photo developed image, glued onto printed announcement/ thank you card
ENVELOPE: C6 with digitally printed envelope insert

Thursday, March 27, 2014

Making ready in letterpress

The process of making ready, is one of the most time consuming parts of printing in letterpress.  It means printing off several proofs and ensuring all lines of text have the same depth of impression as well as being inked with the same fine layer of ink upon the relief surface of the text or image.

The first print off the press is very rarely (I don't think its ever happened to me!) perfect.
The above image is a first print. Its smudgy due to too much ink, but you can see that some lines have more smudging than others.  Since my press is 100+ years old, the rails have been worn down and I have taped them up but they have been worn unevenly, so I have had to tape them unevenly too! It has taken me around 1 year to get them taped so that they are (nearly) even!

This image shows the un eveness of the inking on one of the lines. The reason for this is the un-evenly worn rails at this point. Beneath the script text, the rollers jump in closer, onto the relief of the text and distribute ink to the sides of the text not just the very top of the text as is required.


Not enough impression on the first 3 lines of this proof, more paper packing is needed behind the print to raise it up so each line is pushed in evenly.

An example of a make ready sheet.  You can see the different layers that have been built up sometimes one word or letter at a time. This sheet is placed beneath the top sheet or tympan on the platen and sits beneath each hand fed piece of paper raising each line to the right level.

The aim of a perfect print is to get the ink sitting at the base of the valley that has been created by the text or image pushing into the paper, and not have any ink transferred to the walls of the valley.  Let me point out that back in the days when these printers were used as the industry standard of printing, anything other than the ink sitting just on top of the paper (the ink 'kissing' the paper) was deemed poor craftsmanship, but of course today, an impression is the key!

In order to obtain a perfect print and start the print run, I may need to pull 1- 5 proofs and adjust each time, sometimes a 15-45 minute process depending on 'The Admiral's' mood!

Tuesday, March 4, 2014

Yellow and silver spring save the date invitation

This is a very simple design.  I experimented with the colour of the doily and we just couldn't go past the sunny yellow - although it does still look mighty sweet all in silver too!


SPECS:
A6 oversize card - 110x155mm
300gsm cotton rag paper
2 colours - light silver and bright yellow
C6 envelope, silver with yellow liner

Friday, February 14, 2014

Pastel doily wedding invitation

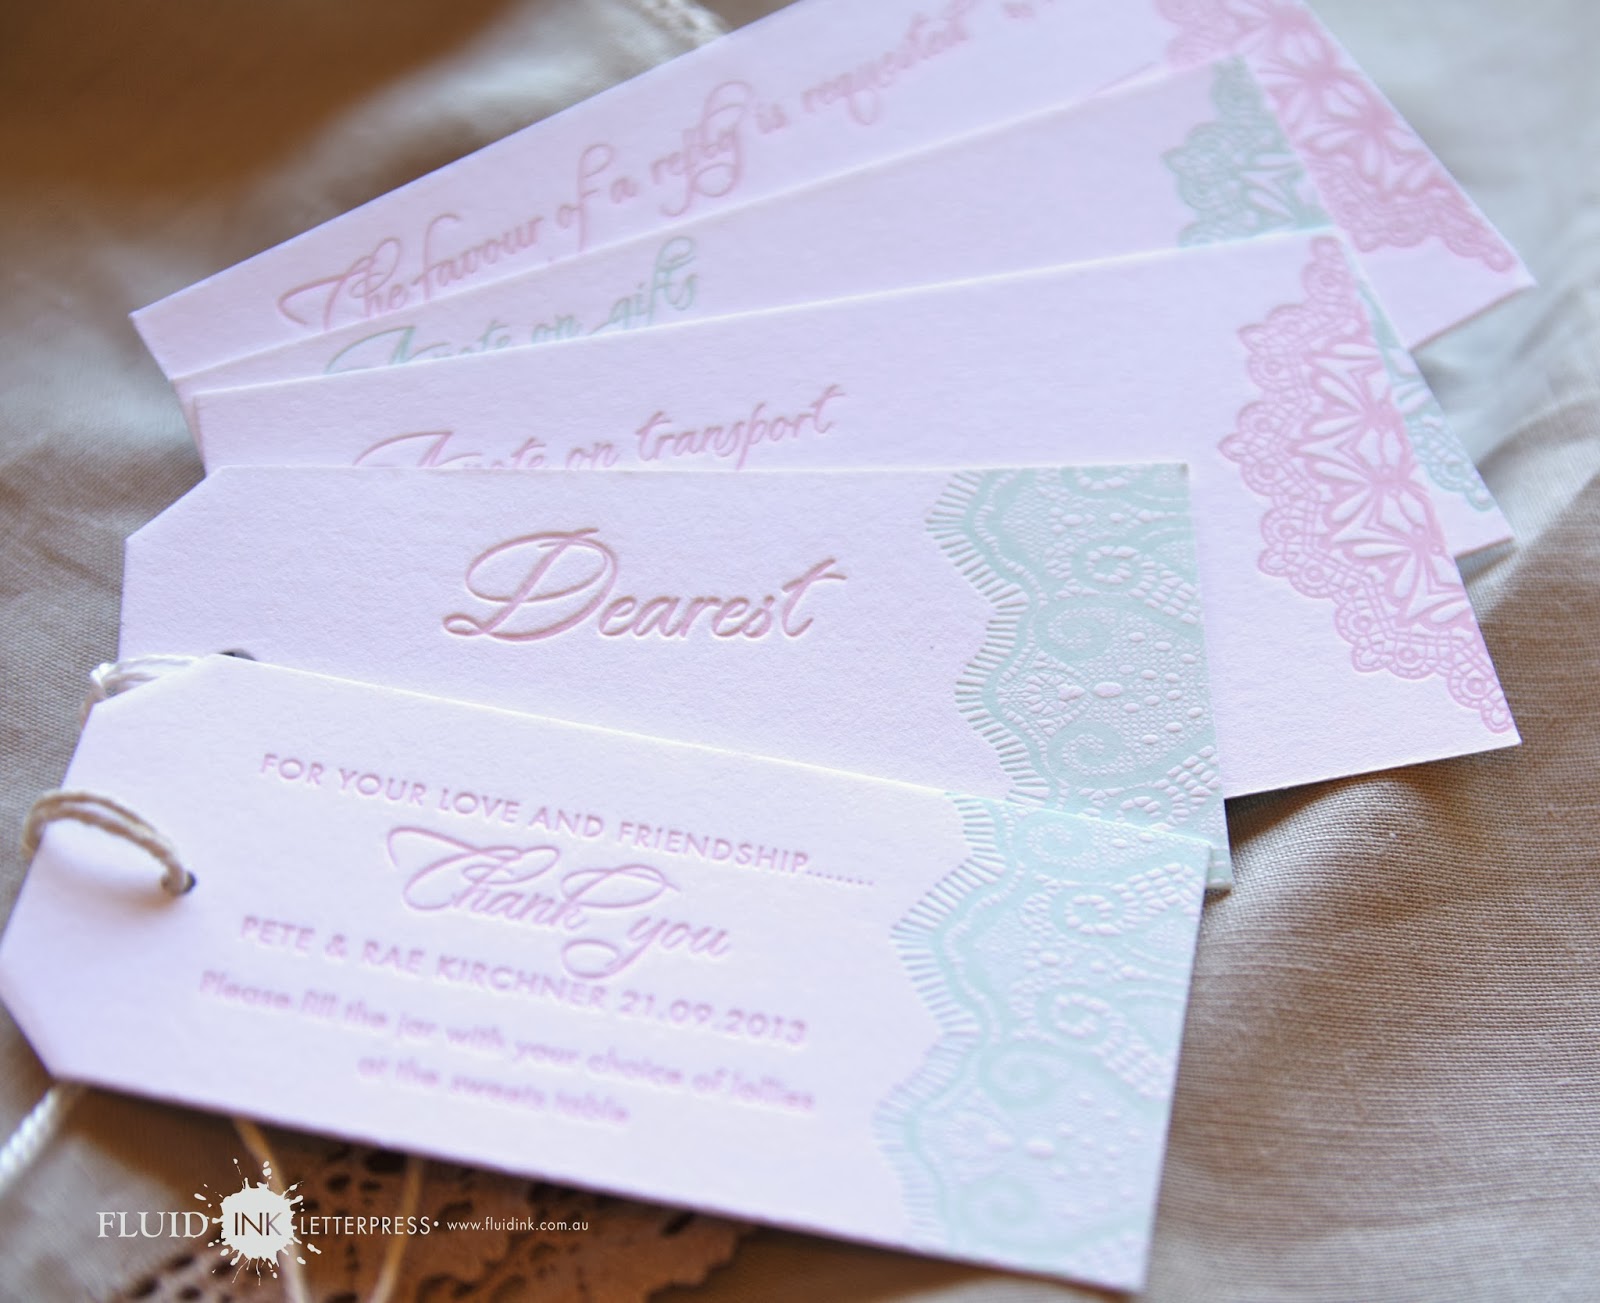
This amazing suite contained several pieces including a 5x7" invitation, RSVP card, a transport note, a gift registry card, a menu, a bonboniere reception card, a menu and a thank you card. The really cool feature of this suite is the 'dearest' card.  It is intended that this card has the invitee's names hand written onto them. They are then threaded with string and wrapped around the whole collection. (see last photo)


Specs:
Invitation: 600gsm Fl white crane's cotton Lettra blind emboss and mint green
Other pieces: 300gsm Fl white crane's cotton Lettra, Mint green and Floss pink

Saturday, January 18, 2014

Monogram Coaster letterpress invitation

These neat invitations were designed by Tim Adams of Live Creative in NSW. They are for a surprise wedding celebration. (OK 2 ideas that I wish I had come up with!!) The design is simple and very modern which I love.  They are printed onto our round coaster stock double sided and accompanied by a Kraft envelope.
I printed some just with the couple's monogram on one side to use as coasters on the day, and they were a perfect match to our 'Eat drink and be married' coasters Available HERE).

Specs:
Coaster card 600gsm recycle paper pulpside one gold, side 2 navy
90x90mm
Kraft envelope
Design By Tim Adams, Live Creative